柔渐强设计酷站
设为首页
加入收藏
酷站首页 || 效果图设计 || 网页设计 || 展览模型 || 设计图库 || 设备租赁 || 图文教程 || 视频教程 || 平面素材 || 3D模型 || 展会资讯 || 酷站简介 || 联系我们 || 论 坛
图 文 教 程
类 别: 三维教程   平面教程   网页教程
小 类: 3DMAX教程   VR渲染器教程   PS入门与实例   CorelDraw   Illustrator
Photoshop绘制Google Chrome浏览器LOGO
 
类 别:  平面教程 >> PS入门与实例 发布者:Stronger 发布时间:2009/3/30 阅读:35015 [返回]

  Make a copy of the recently made layer and use on it the Free Transform option. Press Maintain aspect ratio and make uniformly the copy smaller and then displace it easily. Move off the layer effect out of the copy. Select also the color #4E4A4A for the layer copy. Place the new layer under the previous one. This will be the shadow layer.
  将此图层复制一份,使用自由变换工具,选择保持长宽比,均匀的缩小图层,去掉图层样式.选择颜色#4E4A4A,然后把这个复制层放在原图层的下方.这将作为阴影效果层

制作Google Chrome浏览器LOGO  
图9

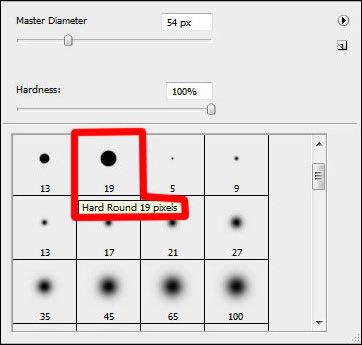
  Create a new layer and use on it a standard brush (Brush Tool (B)) to paint the logotype sectors. Press preliminary Alt button and make a mouse click between the top logotype layer and the new one.
  新建图层,使用标准画笔工具(B)为图标的表面扇叶部分上色,按住Alt键,再左键点击新图层和形状图层之间创建剪贴蒙版(具体参数如下):
制作Google Chrome浏览器LOGO 
图10

制作Google Chrome浏览器LOGO 
图11 

首页 上一页 下一页 尾页 页次:6/16页  1学分/页 转到:
 
 
  ·上个教程:Photoshop打造潮流凹印文字艺术壁纸     ·下个教程:Photoshop设计制作汽车网站头部流程


宝雕会展设计效果图
宝雕会展设计效果图..
百雀羚展会设计效果图
百雀羚展会设计效果..

雪花啤酒新品上市舞台设计
雪花啤酒新品上市舞..
雪歌冬季营销峰会-装典
雪歌冬季营销峰会-..
设计酷Q群:85365573  技术支持:柔渐强(QQ:6712735)  Emial:liujq05@163.com
版权所有: 设计酷站 Copyright @ 2006-2016  粤ICP备11027612号